Tools
Need Help
Home > Documentation > Highway® > Tools
Workflow
Overview | Filters | Individual Cards | Change Assignee | Change Due Date | Card Status | Card Priority | Create Card | Edit Card | Copy Card | Share Card | Delete Card | Add Comment | Attach Policy | Attached Policy Options | Attach Claim | Attached Claim Options | File Storage | Save As PDF | Workflow Report | Workflow Search
Custom Actions
Overview | How To Use
Tools
Overview | Credit Score Updater | Deliverable Generator | Print Report Tool | Report Runner | New Business Rules | Endorsement Rules | Related Claims
Reports
Highway Reports | Test Templates
Overview | System Tag Tool | Update Built-in Tables | Custom Tables | User Management
Tools Guide
Overview
Highway homes effective tools to help your business needs. To access tools, select “Tools” from the navigation bar. This will take you to the Tools page.
Credit Score Updater
To use Credit Score Updater, click on the “Credit Score Updater” button from the Tools page. This will route you to the Credit Score Updater page. OR you can access the Credit Score Updater by clicking the arrow beside “Tools” on the navigation bar and selecting “Credit Score Updater” from the appearing submenu.
To Start – enter the policy numbers you wish to add to the textbox. Use the placeholder as an example, separate each policy number by hitting “Enter” after each or creating a new line. Once all desired policy numbers have been added, select the “Submit” button. Note: Do not add a comma after each, having each policy on its own line will suffice.
On Success – You will then be routed to a success page stating “Success. Please check your corresponding SharePoint folder. It could take up to 15 minutes.” Click on the “Credit Score Updater” button to return back to the previous page.
On Your SharePoint Folder – you will find the CSV file for your entered policy numbers. The table consists of 6 columns: Policy Number, Name, Score Updated, Reason, Previous Score, New Score. Name is the primary insured on the policy, Score Updated states if the Credit Score was updated, Reason states why or why not the score was updated, the Previous score is the primary insured’s previous score, and if it was able to be updated, New Score will be the new score.
Deliverable Generator
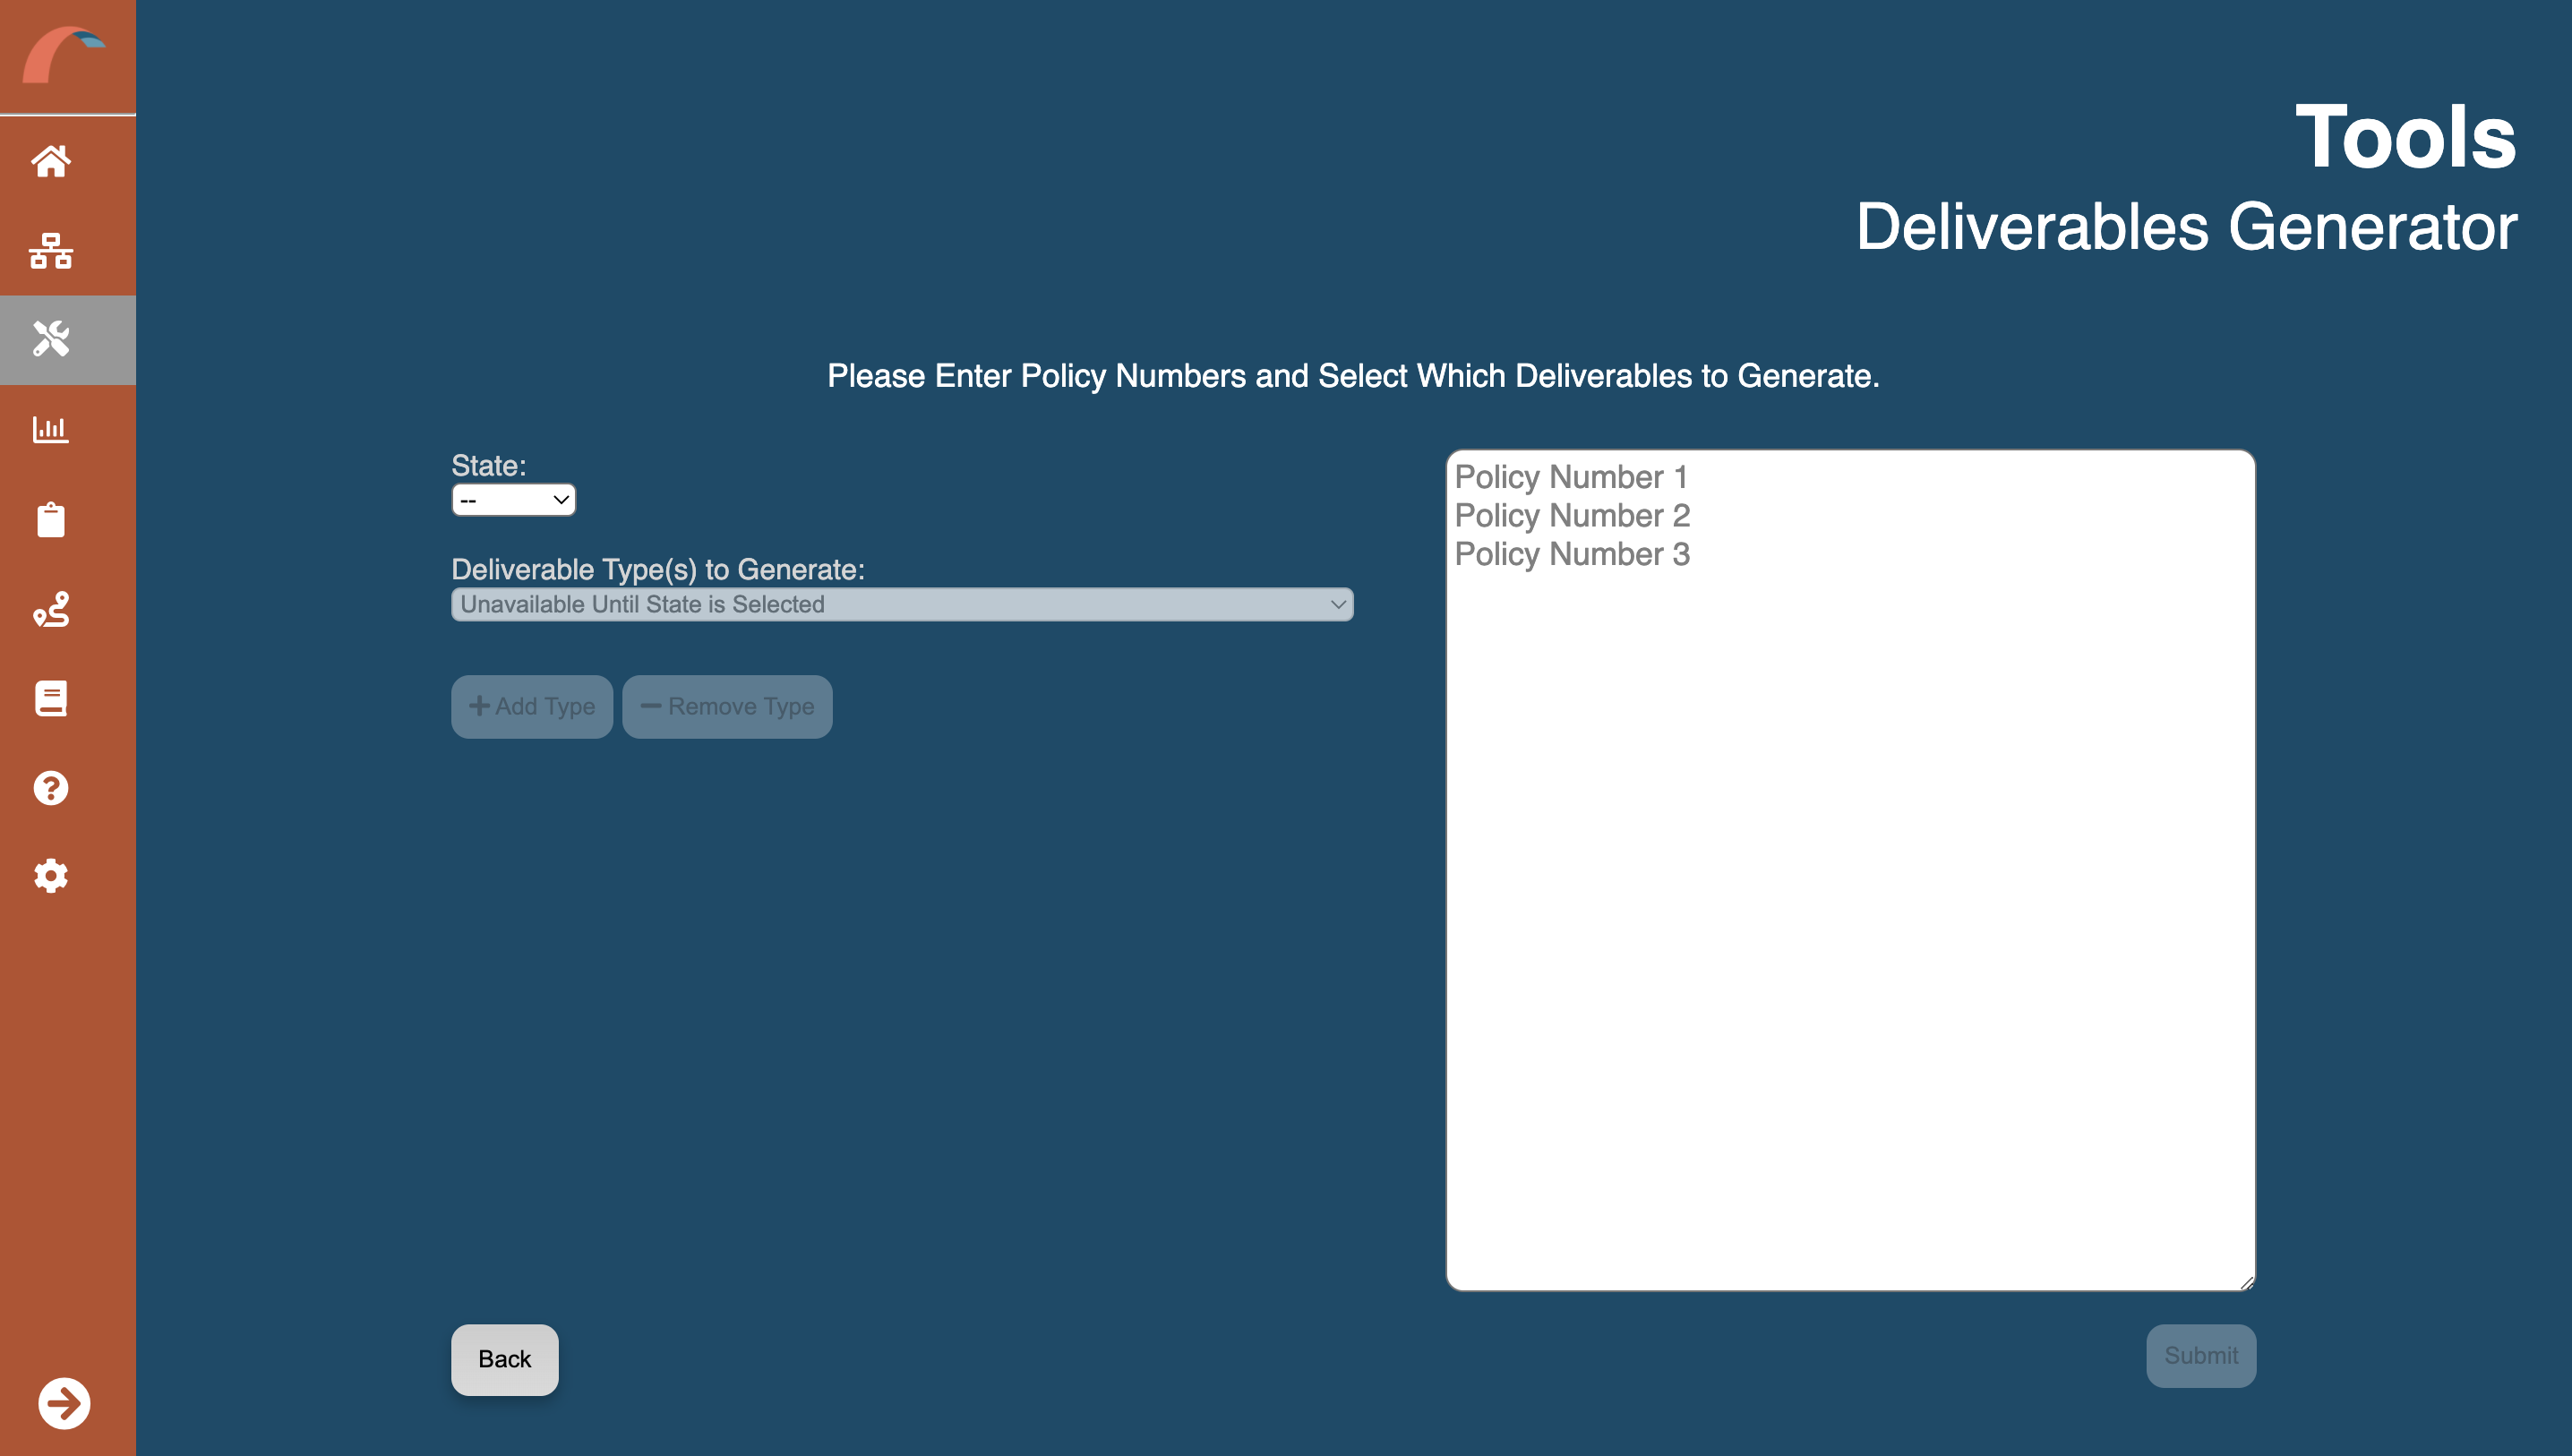
The deliverable generator allows you to create multiple deliverables for multiple policies. To use Deliverable Generator, click on the “Deliverable Generator” button from the Tools page. This will route you to the Deliverable Generator page. OR you can access the Deliverable Generator by clicking on the arrow beside “Tools” on the navigation bar and selecting “Deliverable Generator” from the appearing submenu.
Select The State – use the dropdown beside “Select State”. Depending on your state selection, the available deliverable options will be pulled in. Note: This may take a few seconds as we are gathering the deliverables available in that state for your organization.
Select The Deliverable – use the new active dropdown. If you would like to add more deliverables, select the “Add Type” button. If you added an extra deliverable and would like to remove it, select the “Remove Type” button and it will remove the deliverable from the bottom. Note: you can add up to 10 deliverables at a time.
Enter Policy Number(s) – enter the policies you wish to generate deliverables for on the right textbox. Use the placeholder as an example, separate each policy number by hitting “Enter” after each or creating a new line. Note: Do not add a comma after each, having each policy on its own line will suffice. Click on the “Submit” button once all deliverables and polices have been selected/entered.
Once submitted – you will receive an alert message stating “A card has been created for you in the workflow. Please check the status and download from there.” Navigate to “Workflow” from the navigation bar or continue to generate more deliverables and stay on the page. On Workflow, select the table name dropdown (the first dropdown) and select “Deliverable Generator Report.” The latest card (at the bottom of the table) will be your Deliverable Generator status. Click on the card’s row to open the details module. From the details module, you will see a link for a CSV on your policies’ deliverables status.
The CSV – will consist of 3 columns, Policy Number, Deliverable Name, and Success. Select the link to open the CSV and for each policy and each deliverable, you will be able to see the success status. If Success is TRUE, you will be able to see the deliverable generated on Britcore under the respective Policy’s Attachment tab. If Success is FALSE, the deliverable was not able to be generated for the policy.
Print Report Tool
Use the Print Report Tool to generate daily print reports. To use the Print Report Tool, click on the “Print Report Tool” button from the Tools page. This will route you to the Print Report Tool page. OR you can access the Print Report Tool by hovering over “Tools” on the navigation bar and selecting “Print Report Tool” from the appearing menu.
Usually, daily print reports are generated when there is a bug earlier in the day around printing in BriteCore
To Use – select a date using the date picker when clicking on the “Date” box. Then select the “Submit” button. You should see a success message stating “The Print Report Process has been queued. Please check your email/workflow regularly for the report.”
Report Runner
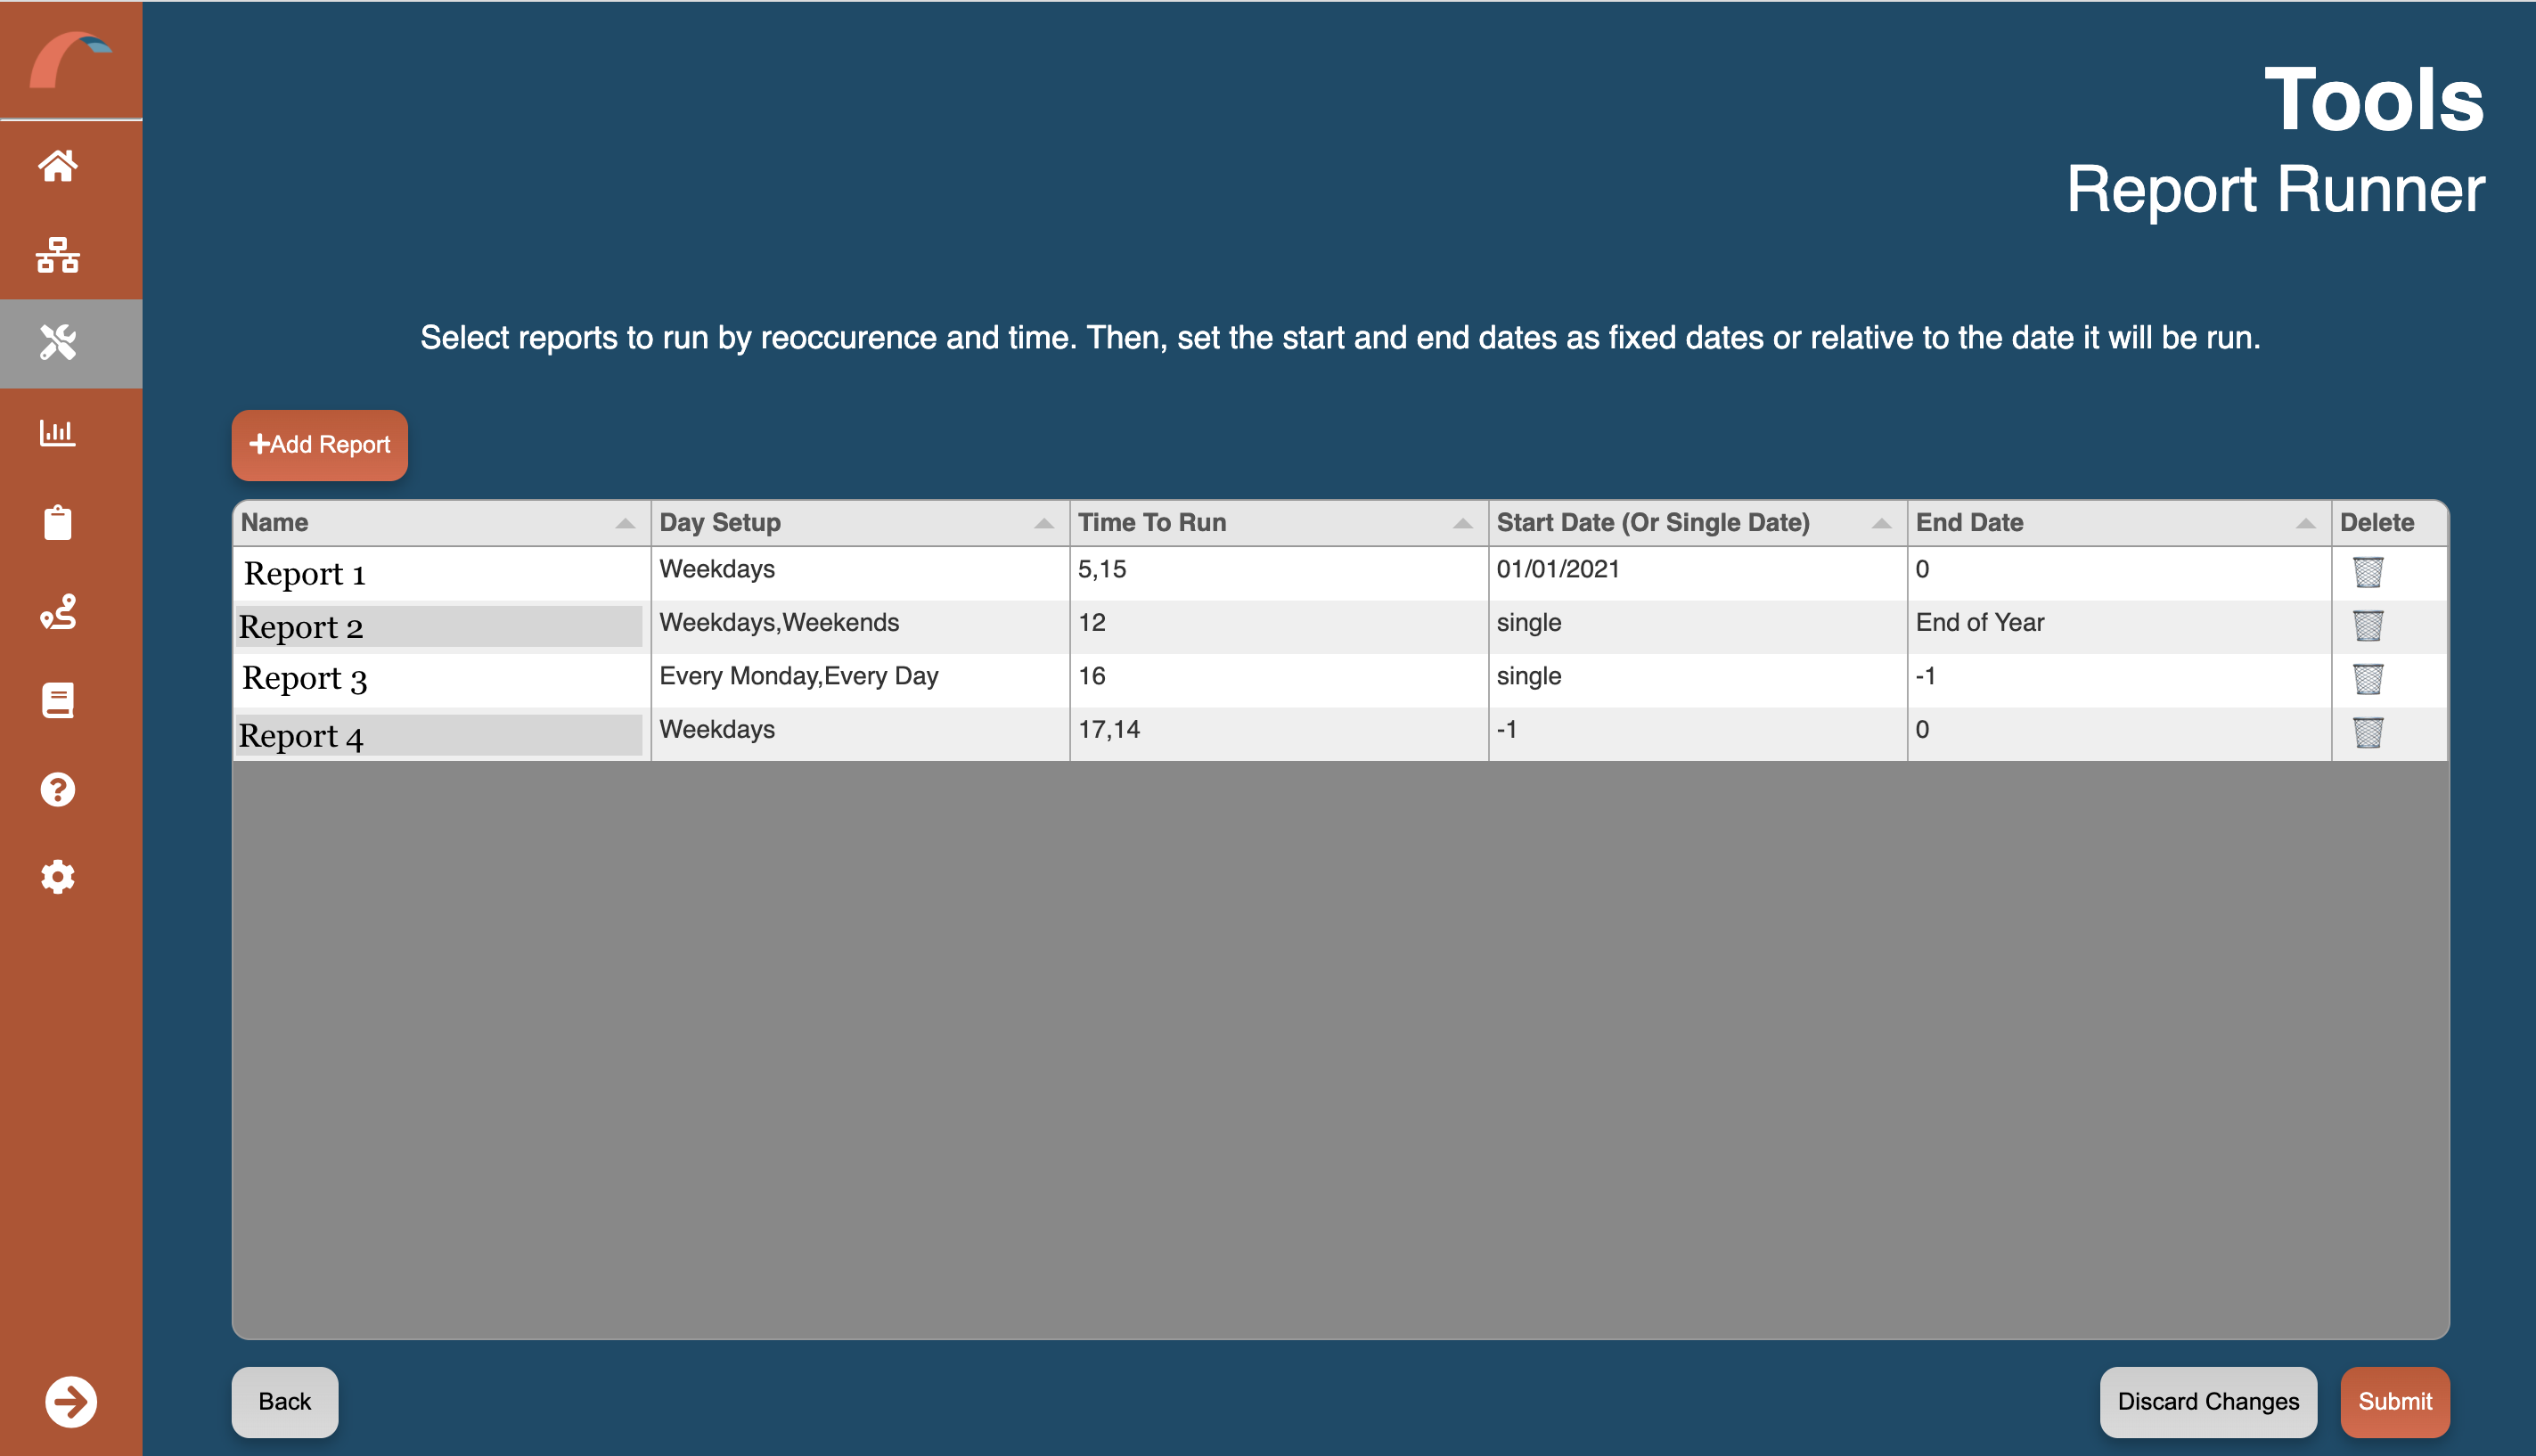
Use the Report Runner to regularly schedule reports. Choose the frequency, time of day, and specify a start and end date to run a report. To use Report Runner, click on the “Report Runner” button from the Tools page. This will route you to the Report Runner page or access the Report Runner by hovering over “Tools” on the navigation bar and selecting “Report Runner” from the appearing menu.
Key Components – The Report Runner table is made up of 6 columns: the name of the report, Day Setup (which days to run), Time To Run, Start Date (Or Single Date), End Date, and a Delete option.
Add a New Report – click on the “Add Report” button. A new row will appear on your table. Select the name of the report by clicking on the Name column. Note: you cannot have duplicates of the same report.
Choose how often you want the report to run with the Day Setup column. You can choose multiple options. For example, you can choose a report to run Every Monday and on Weekends.
Select the hour(s) to run your report by clicking on the Time To Run column. Options are provided on the 24-hour clock. You can choose multiple options. For example, you can run your report at 4 and at 16 to run at 4 a.m and 4 p.m.
Add a start and end date for your report by using the Start Date and End Date columns. Select one of the options on the dropdown (Same Day, Day Before, First/End of Month, First/End of Year), enter a number (-1, 0, 5), or enter a specific date (MM/DD/YYYY). The number can be positive or negative and represents how many days from when the report is run. For example, 0 is the same day, -1 is a day before, and 2 is two days after.
To save your changes, select the Submit button at the bottom of the table.
Make Changes – for the desired report, select the column you wish to update. The row will turn orange to indicate a change is in process. To save your changes, select the “Submit” button. If you would like to discard your changes, select the “Discard Changes” button. This will return to your initial table.
Delete – to delete a report, select the trash can icon beside the report you want to delete. Confirm you want to delete and a success message will appear.
New Business Rules
All users will be able to view which new business rules are active. Admin users will be able to edit the active status of the rules.
Admin users are now able to turn on/off new business rules. Navigate to the Tools page, scroll down to Workflow tools, and click on New Business Rules. Use the “Active” column to turn on or off a rule. Click the green check mark (the rule is on) to turn to a red X (the rule is off) or vice versa. You can activate/deactivate multiple rules at once. Once all desired rules are changed, select the submit button to save your changes. Any new “New Business” cards will only run active rules.
Endorsement Rules
Endorsement Rules are run when a new endorsement comes through. Rules help bring attention to issues that may have been missed. All users will be able to view which endorsement rules are active. Admin users will be able to edit the active status of the rules.
Admin users are now able to turn on/off endorsement rules. Navigate to the Tools page, scroll down to Workflow tools, and click on Endorsement Rules. Use the “Active” column to turn on or off a rule. Click the green check mark (the rule is on) to turn to a red X (the rule is off) or vice versa. You can activate/deactivate multiple rules at once. Once all desired rules are changed, select the submit button to save your changes. Any new “Endorsement” cards will only run active rules.